domenica 23 ottobre 2011

PassionWool bag, rosso e argento...

Image and video hosting by TinyPic


PassionWool  è una borsina in lana lavorata ai ferri.
E' piccolina, tutta rossa  e morbida...
Un triplo fiocco la rende romantica e un po' retrò; le decorazioni con perline e strass la fanno luminosa...
E i tanti anelli in acciaio inox che formano i manici fanno sì che sia molto moderna.


L'interno è foderato con tessuto kimono rosso a fiorellini neri...


La potete trovare su Misshobby e Babirussa e, naturalmente, sul mio lilla's shop...


Image and video hosting by TinyPic

Image and video hosting by TinyPic

giovedì 20 ottobre 2011

A gentile richiesta... le tendine a filet con le rose


isaubi mi ha scritto...


Ciao,dovrei realizzare a filet una tendina (63x42) per una mia amica: ama le rose.grazie

mercoledì 19 ottobre 2011

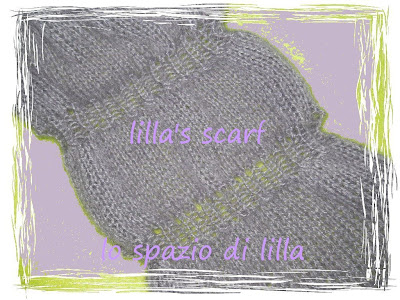
La mia lilla's scarf ai ferri con le spiegazioni / My knitted lilla's scarf with pattern

Per creare la lilla's scarf ho utilizzato due gomitoli da g 50 di Florette 2000 della Grignasco.
Soffice e leggera come una nuvola,  lavorata con i ferri n° 5, è composta dal 50% di Mohair e 50% di Dralon.

To create lilla's scarf I used two yarns of Florette 2000 by Grignasco, 50% Mohair and 50% Dralon, ozs 1,76 and 191 yds each one.
I knitted the scarf using a n. 5 knitting needles. 

E' una sciarpa da fare anche molto lunga, visto che la sua morbidezza permette di girarla intorno al collo più e più volte.

This scarf is very soft and light, so if you like, you can knit a very long size...
Oltre alla maglia rasata, ho utilizzato lo schema per il Punto Smock: è proprio questo punto che crea l'effetto arricciatura della sciarpa.

I used the plain knit and the "Punto Smock" stitch: it's just this one that creates the curly shape of the scarf...
Realizzarla è molto semplice...Io ho fatto così:

Avviare 59 maglie
1 f: rov
2 f: rov
3 f: rov
4 f: rov
dal 5 al 29 f: maglia rasata dritta
31 f: punto smock come da diagramma seguente. Io ho lavorato anche una maglia a dritto di vivagno all'inizio e alla fine del ferro.
I ferri del rovescio si lavorano come si presentano.


Dopo aver eseguito il punto smock, lavorare 20 ferri a maglia rasata dritta e ripetere di nuovo il Punto Smock.
Continuare così fino a raggiungere la lunghezza desiderata...
Anche l'utilizzo di filati più grossi permette di realizzare una splendida sciarpa.
Buon lavoro da lilla!!!!

To realise the lilla's scarf is very simple...Here is the way I did:

Cast on 59 stitches
1 row: purl
2 row: purl
3 row: purl
4 row: purl

from 5 to 29 row: plain knit / stocking stitch
31 row, Punto Smock following this pattern. I stitched 2 edge st too

After you knitted the Punto Smock part, knit 20 rows using stocking stitch and again Punto Smock...
Go on this way 'til you reach the lenght you like...
You can also use a bulky yarn: the result will be very cute, too!
Have a good knitting!!!
P.s.:I tried to write a knit pattern for the first time... If I made mistakes, please, feel free to give me any advices; I'll be glad to make my next pattern more correct!
Image and video hosting by TinyPic

martedì 11 ottobre 2011

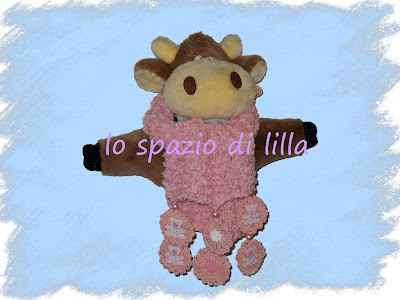
Se la sciarpa è per una bambina...colore rosa, orsetti e perle

Image and video hosting by TinyPic

...Non possono mancare gli orsetti che le faranno compagnia nelle giornate fredde!
Orsetti dal musetto allegro e dalle zampette spalancate che sembrano volerti circondare da un abbraccio tenero tenero...

Orsetti che pendono dalla sciarpa, dando vita ad un acchiappasogni di lana...


Ho lavorato la sciarpa con la LANA CULLA, ed ho aggiunto dei fiori crochet appesi a perle rosa per decorazione...
Su quattro dei sei fiorellini ho attaccato gli orsetti termoadesivi e sui due centrali ho inserito dei fiorellini di gomma bianchi.

Il retro dei fiori è stato decorato con altri fiorellini e cerchietti rosa...


Spero che questa sciarpina possa fare tanto tanto caldo a "Fedechicca" durante l'inverno!

Image and video hosting by TinyPic

Image and video hosting by TinyPic

domenica 9 ottobre 2011

Facciamo insieme...Il fantasmino per Halloweeen / Let's make together... A cute ghost for Halloween

Come fare un simpatico fantasmino che svolazzi per casa ad Halloween?
Semplice, basta avere una pallina di polistirolo non troppo grande, del cotone bianco (magari un vecchio lenzuolo, no?...), un ferro da calza sottile, del filo di nylon trasparente e qualche perlina...

How to make a cute little ghost, fluttering about our home during Halloween days?
It's easy if you got a medium size polystyrene ball, white cotton fabric (maybe an old cotton sheet, isn't it?...), a thin knitting needle , nylon thread and some beads...


Dal cotone ritagliate un cerchio, anche non perfetto, che misuri all'incirca cm 72 di diametro. Nella foto il tessuto è piegato a metà.

Using the  white cotton fabric, cut an imperfect circle of about cm 72 in diameter. In the pic, the fabric is fold.


Con il ferro da calza, praticate un foro nella pallina di polistirolo.

With the knitting needle make a hole in the polystyrene ball.


Tagliare del filo di nylon abbastanza lungo da passare nella pallina e da formare anche un anello per appendere il fantasma. Prima di infilarlo in un lungo ago, inseriamoci una perlina ferma filo.

Cut a long piece of nylon thread, enough to be inserted into the polystyrene ball and to get a ring to hang on the ghost. Before threading the nylon in the needle, thread  a bead in.


Ora, infiliamo l'ago prima nel centro del pezzo di tessuto e poi nella pallina...

Now, insert the needle first in the centre of the cloth and then inside the little ball...


Togliamo l'ago, infiliamo un'altra perla, un po' più grande dell'altra e riannodiamo bene il filo.

Get off the needle, thread a bead (bigger than the other one) and knot the nylon thread.


Il tessuto ricopre la pallina di polistirono, dando così vita al fantasmino, e sulla sua testa  abbiamo il filo per appenderlo dove vogliamo...

Now, the cloth recover the polystyrene ball, making the little ghost, and on its "head" ther's the nylon  thread
 to hang on it everywhere we like...

L'unica cosa che manca, è il suo faccino... Basta un pennarello indelebile nero per disegnare gli occhi e la bocca ed il gioco è fatto!

Now it's time to draw the ghost face, using a black permanent marker and the little ghost is really ready!!!


Image and video hosting by TinyPicImage and video hosting by TinyPic

Image and video hosting by TinyPic