Visualizzazione post con etichetta fai da te. Mostra tutti i post

domenica 15 aprile 2012

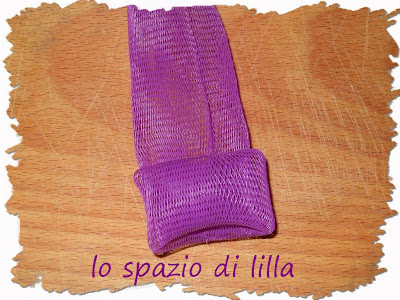
Facciamo insieme...I cappellini con le retine dell'aglio / Let's make together...Little hats with the net for the garlic


Ecco, questo è quello che definisco un tutorial "stupidino", nel senso che non è indispensabile avere più di 3 o 4 neuroni in giro per il cervello!
I miei, di neuroni, si sono accesi forse per il bel colore viola della retina, così, dopo aver tirato fuori le teste d'aglio, mi sono ritrovata a fare i risvolti all'involucro per dargli la forma di un cappellino...e non l'ho più buttata via.

Well, this is what I call a "silly tutorial", because I think it's enough to have 3 or 4 neurocytes going around our brain to do it!
I feel sure that my neurocytes started up working because of the great colour of the net, a beautiful purple, so, after I put off the garlic, I started to fold up the net for three times so to give it the shape of a hat...


Per rendere i cappellini più graziosi, ho aggiunto sulla sommità dei nastrini e dei fiorellini da bomboniera...
Secondo voi, come sarebbero se utilizzati come segnaposto, riempiti con confetti avvolti nel tulle?

To embellish the hats, I added some flowers and some ribbons...
And what about using them for a ceremony table, filled with italian confetti?


Image and video hosting by TinyPic

lunedì 6 febbraio 2012

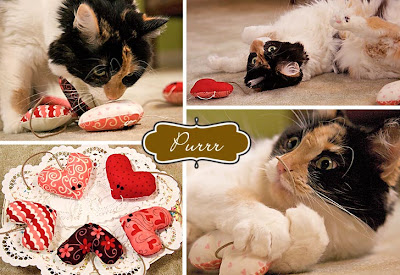
Cuori? Ecco come ce li propone s4h


Sew4home è un fantastico sito dove trovare innumerevoli tutorial per il fai-da-te.
In occasione di San Valentino vi propongo queste idee accattivanti e simpatiche...
Perfino chi non ha momentaneamente un "moroso", può cucire il suo cuoricino da regalare all'amore di gatto che ha in casa!!!!!


Che ne dite, vi va di farci un salto?


Image and video hosting by TinyPic

giovedì 24 novembre 2011

Facciamo insieme...L'alberello di Natale con il filo di metallo / Let's make together... The wire Christmas tree


E' ormai tempo di decorazioni natalizie...
Stavolta ho pensato di usare un metodo più semplice del cucito per creare degli alberelli di Natale, da poggiare o appendere in giro per la casa.

It's time for Christmas decorations...
This time I thought about something easier than sewing, to create little Christmas trees  to lean or to hang around our rooms.


Image and video hosting by TinyPic


Ciò di cui abbiamo bisogno è:
filo di metallo, un paio di pinze, uncinetto e filati di lamè nei colori tipici del Natale...

We need of metallic wire, pliers, crochet hook and lamé thread in tipical Christmas colours...


Tagliamo un pezzo di filo ed aiutiamoci con un oggetto a cono per dare la forma a spirale.
Io ho usato una base da uovo di Pasqua...

Let's cut a piece of wire ad use something to have a spiral shape.
I used the cup we usually find under a big Easter chocolate egg...


Modelliamo la spirale dandole la forma dell'alberello, dalla base larga fino alla punta.
Con la pinza, fare un occhiello che blocchi il filo alla base ed uno sulla punta, che possa poi servire anche per appendere l'alberello.

Let's model the spiral, giving it a tree shape, from the large base to the tip.
Let's make two loops with the pliers, one to block the wire on the base and the other on the tip, useful to hang on the little tree, too.


Ora possiamo iniziare a rivestire il metallo con l'uncinetto ed il filo in lamé, iniziando indifferentemente dal basso o dalla punta...

We can start crocheting the wire tree, using the lamé thread: it's the same to start from the base or from the tip...


Per decorare la punta dell'albero facciamo una catenella abbastanza lunga da poterne ottenere un fiocchetto...

To decorate the tree tip, let's crochet a chain long enaugh to obtain a bow...


E questo è tutto! Spero che vi possiate divertire a fare questi alberelli decorativi tanto quanto mi sono divertita io...

And that's all!
I hope you'll enjoy this tutorial as I did while I was creating it...


Image and video hosting by TinyPicImage and video hosting by TinyPic
Image and video hosting by TinyPic

domenica 9 ottobre 2011

Facciamo insieme...Il fantasmino per Halloweeen / Let's make together... A cute ghost for Halloween

Come fare un simpatico fantasmino che svolazzi per casa ad Halloween?
Semplice, basta avere una pallina di polistirolo non troppo grande, del cotone bianco (magari un vecchio lenzuolo, no?...), un ferro da calza sottile, del filo di nylon trasparente e qualche perlina...

How to make a cute little ghost, fluttering about our home during Halloween days?
It's easy if you got a medium size polystyrene ball, white cotton fabric (maybe an old cotton sheet, isn't it?...), a thin knitting needle , nylon thread and some beads...


Dal cotone ritagliate un cerchio, anche non perfetto, che misuri all'incirca cm 72 di diametro. Nella foto il tessuto è piegato a metà.

Using the  white cotton fabric, cut an imperfect circle of about cm 72 in diameter. In the pic, the fabric is fold.


Con il ferro da calza, praticate un foro nella pallina di polistirolo.

With the knitting needle make a hole in the polystyrene ball.


Tagliare del filo di nylon abbastanza lungo da passare nella pallina e da formare anche un anello per appendere il fantasma. Prima di infilarlo in un lungo ago, inseriamoci una perlina ferma filo.

Cut a long piece of nylon thread, enough to be inserted into the polystyrene ball and to get a ring to hang on the ghost. Before threading the nylon in the needle, thread  a bead in.


Ora, infiliamo l'ago prima nel centro del pezzo di tessuto e poi nella pallina...

Now, insert the needle first in the centre of the cloth and then inside the little ball...


Togliamo l'ago, infiliamo un'altra perla, un po' più grande dell'altra e riannodiamo bene il filo.

Get off the needle, thread a bead (bigger than the other one) and knot the nylon thread.


Il tessuto ricopre la pallina di polistirono, dando così vita al fantasmino, e sulla sua testa  abbiamo il filo per appenderlo dove vogliamo...

Now, the cloth recover the polystyrene ball, making the little ghost, and on its "head" ther's the nylon  thread
 to hang on it everywhere we like...

L'unica cosa che manca, è il suo faccino... Basta un pennarello indelebile nero per disegnare gli occhi e la bocca ed il gioco è fatto!

Now it's time to draw the ghost face, using a black permanent marker and the little ghost is really ready!!!


Image and video hosting by TinyPicImage and video hosting by TinyPic

Image and video hosting by TinyPic