


If you wish to create something very very soft, this tutorial for sewing three little stuffed cushions is just for you!

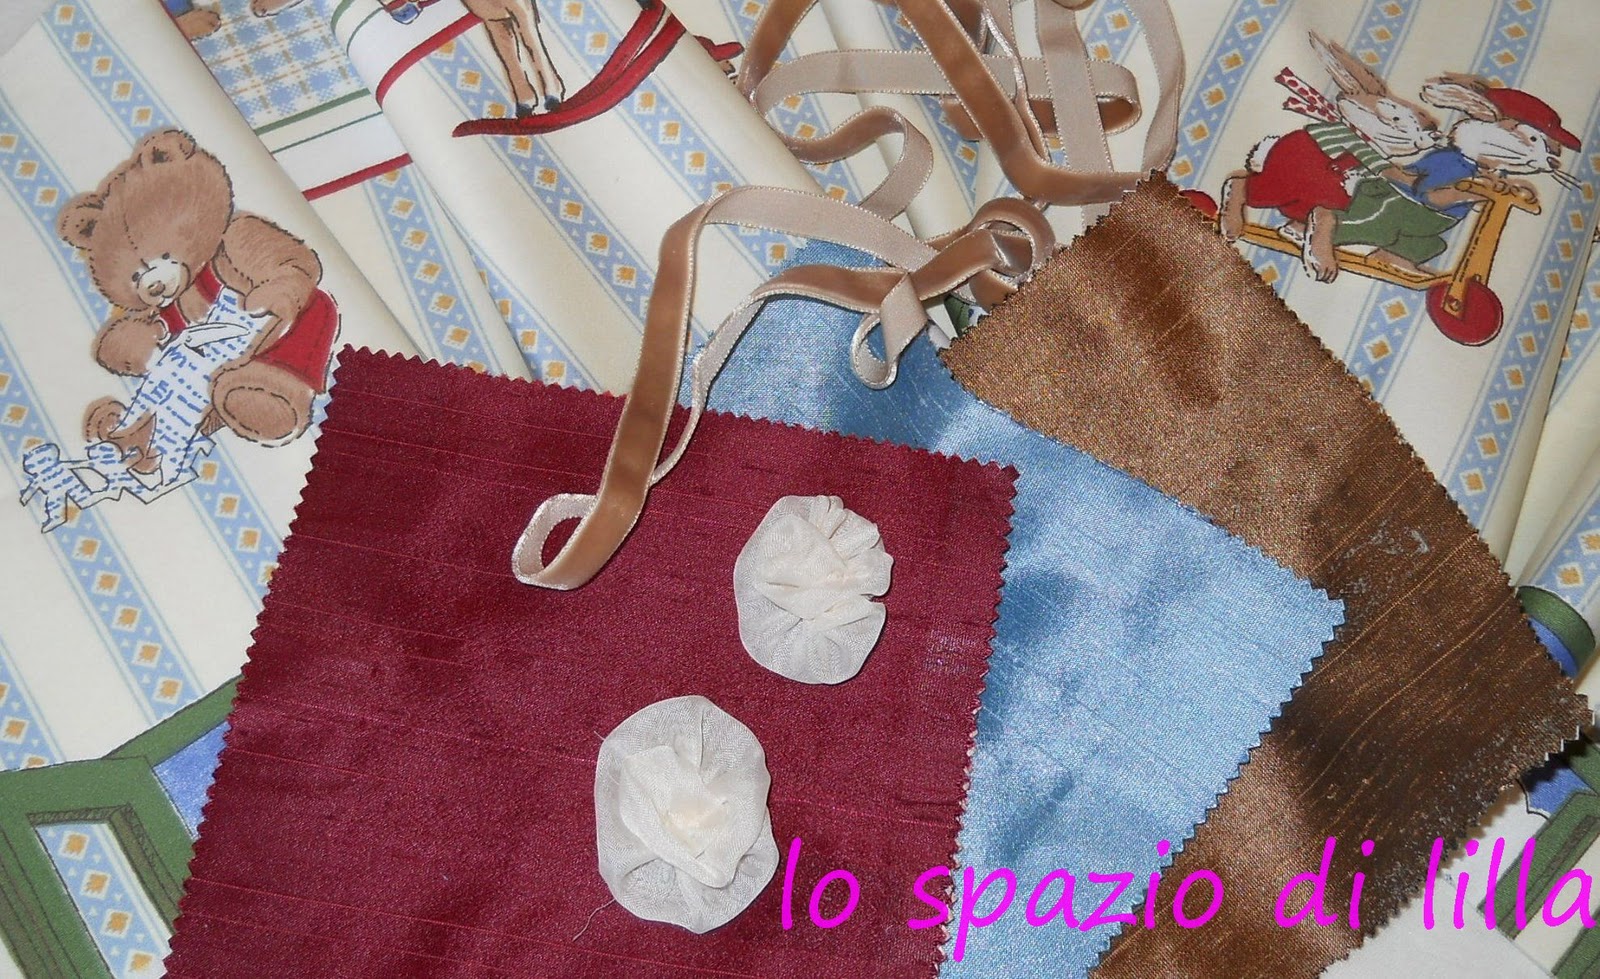
Per prepararli ho usato del tessuto stampato con degli animaletti (che sono stati lo spunto per fare questo lavoretto), del tessuto a tinta unita per il retro, della telina termoadesiva. Per decorarli ho utilizzato dei nastri di organza e di velluto, del pizzo ed alcuni bottoni.
I used a toy printed fabric, with a teddy bear, a rocking horse and two bunnies; three squared plain fabric for the back side; some fusible interfacing. To embellish them, I used velvet and organdis ribbons, some lace and some buttons.
First of all, I ironed the fusible interfacing on the reverse of the printed fabric...

...che dietro ai pezzetti di stoffa per il retro. Come potete notare, ho usato delle strisce di rinforzo che non avevo buttato via...
And on the reverse of the plain fabric used for the back of cushions. As you can see, I used many little stripes of interfacing, that I didn't throw away...

Usando poi della carta riciclata dai pacchi dei biscotti, ho disegnato e ritagliato tre sagome diverse, che fossero in grado di racchiudere i vari disegni da me scelti.
I used some recycled paper from biscuits box to draw on it three different shapes. I paid attention till the size was right to contain the printed subjects.

Qui sotto potete trovare le sagome da me disegnate ed utilizzate per ritagliare le parti dei cuscinetti. Se volete potete stamparle...
Here you can find the three patterns I draw and used to cut the cushions parts. If you like, you can print them...

Ecco posizionate le sagome in base al soggetto che le abbellirà ed ai colori che andrò ad usare per il retro.
In this pic, you can see how I decided the shape for each subject and the color for the backside...

E' arrivato il momento di tagliare i tessuti.
Now it's time to cut the fabrics: twice for the heart, twice for the rectangle and the same for the round shape.


Dopo aver ritagliato tutte le parti, le doppiamo fissandole con gli spillini...
After we cut all the shapes, we double and pin them...

Non dimentichiamo di aggiungere il nastro doppiato di velluto che servirà per appenderli.
Don't forget to add the central hanger, which is made by a doubled velvet ribbon.

Ora si può passare alla cucitura esterna, utilizzando il punto zig-zag. Naturalmente lasciamo aperto un piccolo spazio per inserire poi l'imbottitura.
Now we can start sewing the external side of the shape using the zig-zag stitch. Anyway, remember to have a little side opened, just to fill in the stuff.


Dopo aver completamente imbottito il cuscinetto, possiamo terminare la cucitura e chiudere l'apertura nel tessuto.
After we have fullfilled the little cushion, we can finally sew the open side closing it.


Ecco il cuscinetto a forma di cuore al termine della cucitura.
Here it is the heart shaped cushions after I sewed it.

Naturalmente, come già ho accennato all'inizio, i cuscinetti vanno decorati: ecco i miei tocchi finali per ciascuno di loro:
Naturally, as I said before, we must embellish our little cushions: here there are my final touches one by one:
 :
:


I really hope you appreciated my tutorial and, waiting for a new one, I wish you to have fun making these little cushions.


