

Allora, siete pronte per iniziare? Come promesso, è il momento di seguirmi passo passo nella realizzazione di questa borsetta molto carina... Per le neofite: non è difficile, basta fare le cose con calma ed avere un po' di pazienza.
Ready to start sewing a fabric handbag with me? It isn't so difficult as it appears: follow the instructions step by step with a little bit of calm and patience!!!
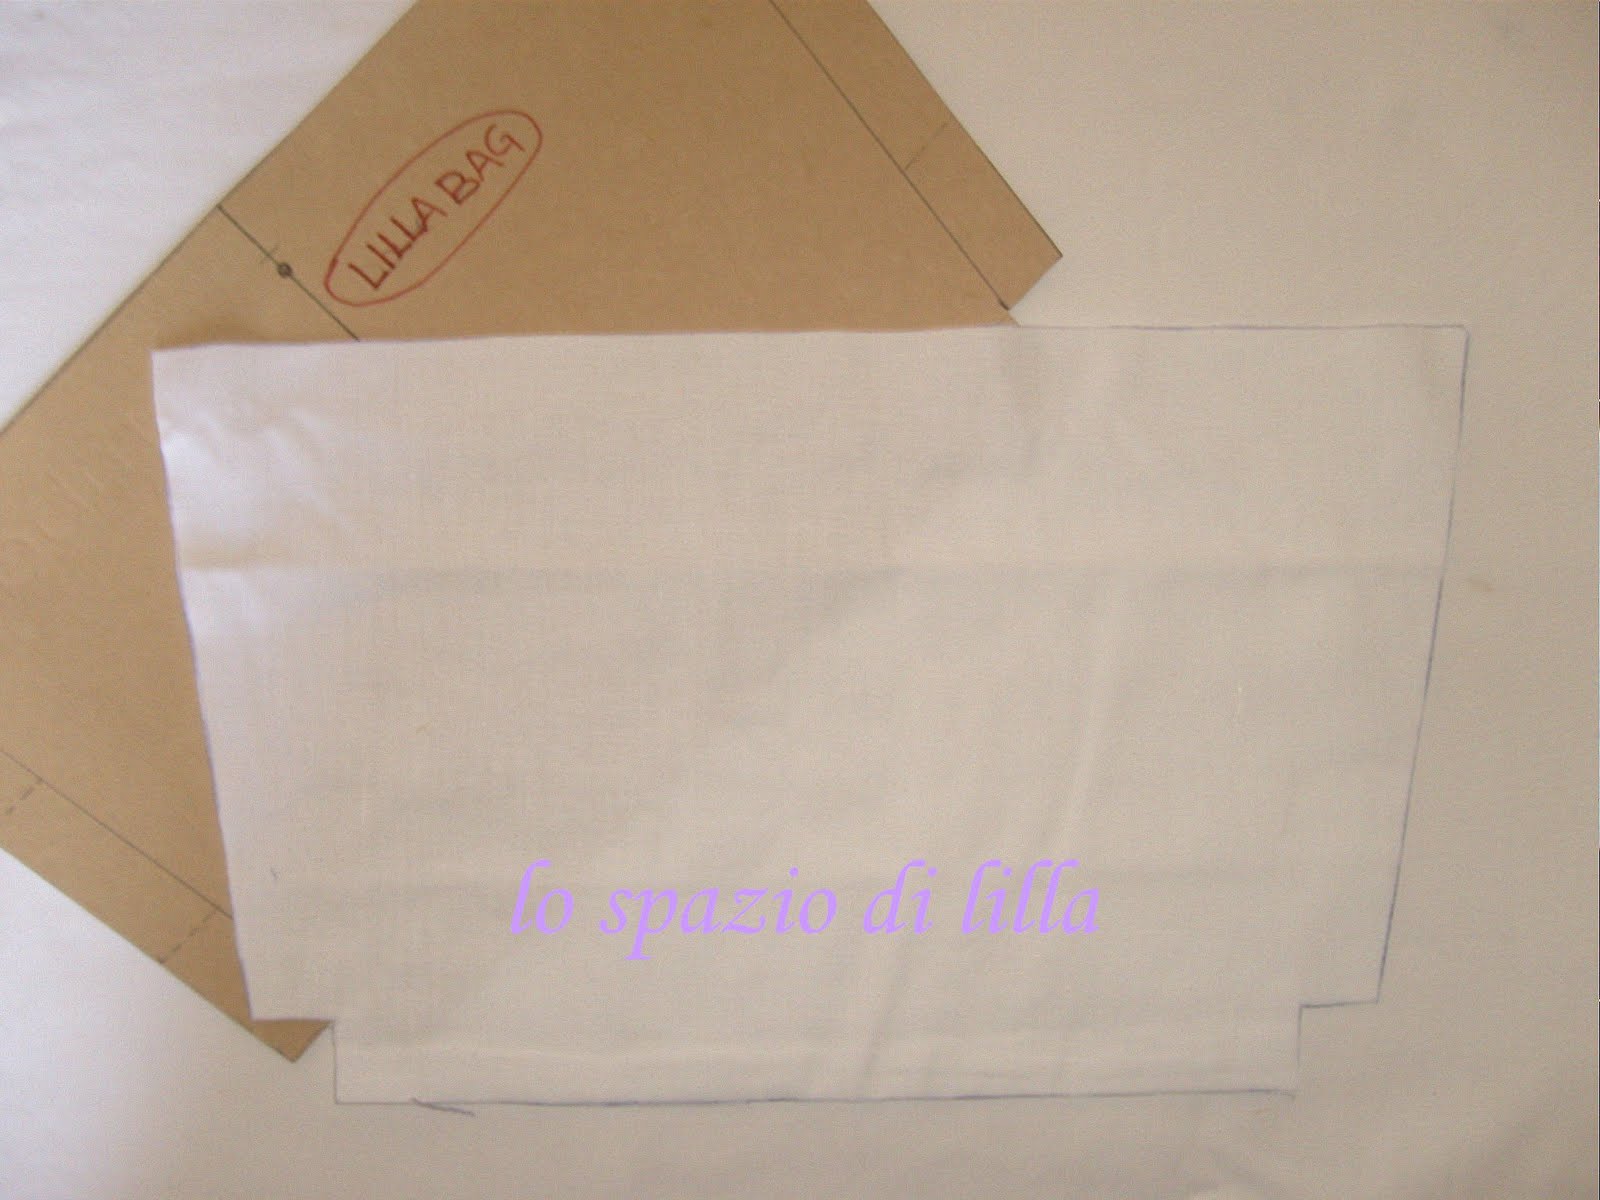
Prima di tutto, il modello. Ho scannerizzato la metà di un mio disegno. Stampatelo due volte ed incollate i pezzi al centro. Sicuramente non è perfetto, quindi: abbiate pietà di me!.....
First of all, here it is the pattern: print it two times and stick them together on its centre...

Una volta che avete in mano il cartamodello, usatelo per ritagliare due parti nel tessuto esterno...
Once you have got the complete pattern, use it to cut the external fabric twice...

Due parti in rinforzo termoadesivo (prendete il più consistente che riuscite a trovare)...
Cut twice the fusible interfacing...
E due parti in fodera... Il tutto tagliato a filo del cartamodello, senza aggiungere margini.
And finelly, cut twice the inside lining. Remember you must cut everything following the pattern. No seam allowance is needed.

Per la taschina, tagliate un rettangolo di cm 24x18 da doppiare per il lato più lungo...
For the inside pocket, cut a cm 24x18 rectangle ( or any other size you prefer) which will be fold on its longer side.

Ora passiamo al taglio dei manici: il mio "segreto" è quello di utilizzare il rinforzo adesivo per cucire la cinta delle gonne...
Now it's time to cut the handles: My "secret" is to use the fusible strengthner for skirts weistbands...

Tagliatene due strisce della lunghezza di 30 cm ciascuna ed incollatele sul rovescio del tessuto con il ferro caldo a secco.
Cut two strips of 30 cm long and iron them on the revers of the fabric. Use dry hot ironing.

Una volta incollate le strisce, ritagliate i manici a filo del rinforzo...
Come potete vedere, sarà facilissimo piegarle per poi cucirle...Once the strips have been ironed, cut the handles following the margins...
As you can see, it is very simple to fold up and sew the handles.

Ora posizioniamo il rinforzo termoadesivo sul rovescio dei due pezzi del tessuto esterno ed incolliamolo per bene utilizzando il ferro da stiro...
Now it's time to iron the fusible interfacing on the reverse side of our external fabric.

.....

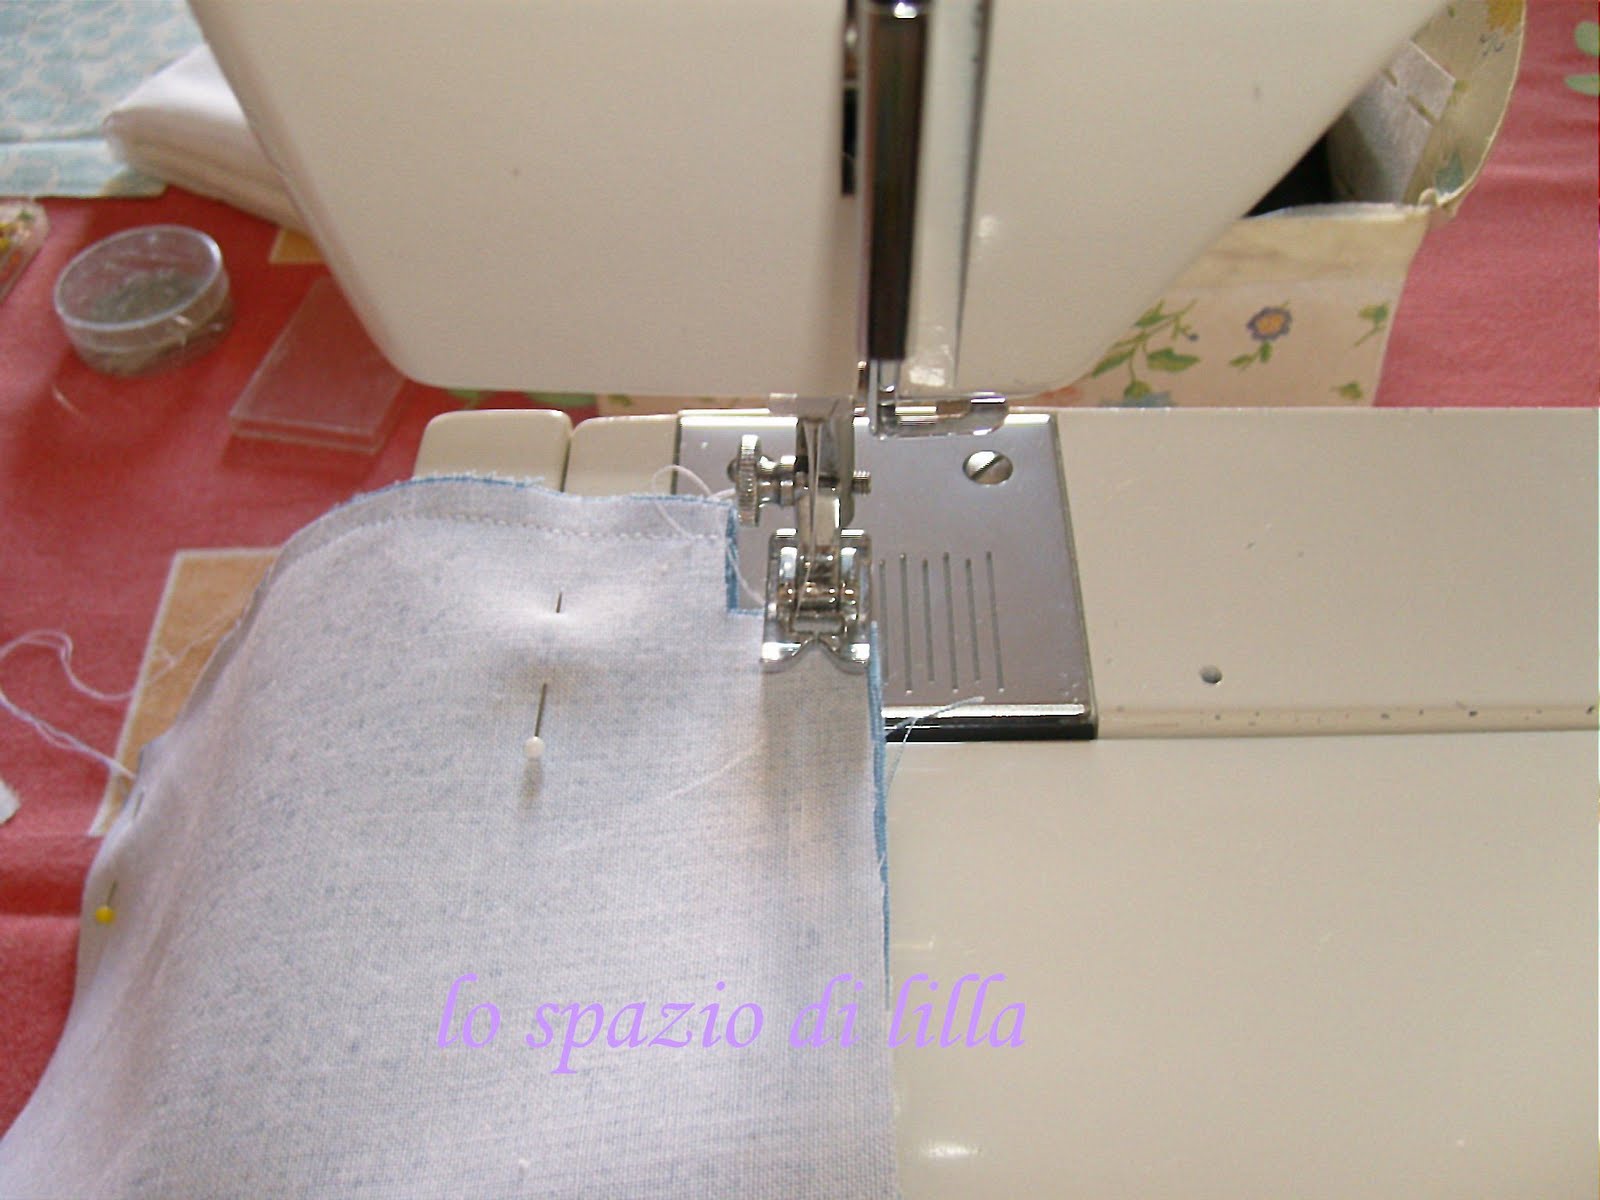
Sovrapponiamo dritto contro dritto i due tagli di tessuto esterno e cuciamo a macchina i due lati...
Superimpose right to right the two external sides and sew the right and the left side ...

Saltiamo gli spigoletti e cuciamo tutto il fondo...
Skip over the two angles and sew the bottom...
Ora, per cucire gli spigoli, apriamo la parte del lato, facendo combaciare la cucitura con quella del fondo...
To sew the corners, enlarge the bag and make the lateral side stitch matching with the central bottom stitch; so, the right side angle matches with the bottom angle...

Dopo di che, seguiamo la linea del taglio e chiudiamo lo spigolo...
Now we can sew the corners...

Ecco il rovescio della borsetta, cucita sia ai lati che al fondo...
Here it is how appears the revers of our handbag, sewn on the lateral sides and on the bottom...

Rivoltiamo la borsetta al dritto...
Let's turn inside out our bag...

Ed iniziamo a cucire il taschino della fodera, dopo averlo piegato a metà per il senso della lunghezza ...
Now it's the turn of sewing the inside pocket. Let's fold it up on the longest side and start sewing it...

Ne cuciamo i due lati ed il fondo, tralasciando 4/5 cm di apertura per risvoltarlo...
As one side is double, we have to sew the two short sides and the remnant long one, being careful to leave some space open on its centre to turn inside out the pocket later...

Prima di risvoltarlo, però, eliminiamo gli spigoli in eccesso, per poi avere degli angoletti migliori al diritto...
Before turning it inside out, let's cut the angles points so we'll have better corners on the right side...

Ecco il taschino risvoltato e stirato...
And here it is the inside pocket turned inside out and ironed.

Come ultima rifinitura, facciamo un trapunto sul lato chiuso superiore...
Now we sew only the upper side, before we stitch it on the lining...

E' il momento di pensare alla fodera: marchiamo con una penna il punto in cui andrà posizionato il bottone magnetico (sul modello c'è un pallino da considerare), poi ritagliamo due rettangolini di teletta per rinforzare la porzione di tessuto, ed incolliamo il primo sul tessuto, il secondo sulla teletta già incollata, come ulteriore rinforzo...
Let's start now with the lining.
With a pen, following the little hole on the pattern, murk the button place.
Cut two rectangles of fusible interfacing to reinforce the fabric where we'll put the magnetic snap, and iron them one on the fabric and the second one on the first interfacing...

Utilizzando l'anima in metallo ed una penna, segnamo le due lineette per inserire il bottone...
Using the metal disk, mark the points to cut for inserting the snap prongs...

E ritagliamole senza allungarci troppo, con delle forbicine dalla punta sottile...
Make two very small slits into your markings...

Inseriamo le linguette del bottone dal diritto...
Now, push the prongs into the right side of your fabric.

Posizioniamo l'anima di rinforzo...
Insert one of the thin metal discs over the prongs on the wrong side of the snap.

Allarghiamo lateralmente le alette, spingendo con le dita... Ora il bottone è messo. La stessa operazione va eseguita sull'altro pezzo di fodera, cercando di far combaciare le due parti del bottone il più possibile...
Then push the prongs down flat (away from each other) with your thumb.
Repeat the same steps with the other part of the lining.

Ora possiamo posizionare il taschino sotto il bottone, lo fermiamo con degli spillini e lo trapuntiamo per tre lati, chiudendo così anche l'apertura che era rimasta alla base...
Now we can place the inside pocket under the magnetic snap, fixing it with some pins, and we can sew it on the three sides, paying attention to close the open space on its bottom.

Sovrapponiamo anche le due parti di fodera dritto contro dritto e cuciamo i due lati e due piccole porzioni del fondo, lasciando una bella parte centrale aperta per risvoltare la borsa comodamente in un secondo tempo.
Superimpose the two sides of lining and sew the two lateral sides and the bottom. In this case, we must leave a quite large opened side on the bottom to turn inside out the bag.

Per cucire gli angoli, ripetiamo la stessa operazione che abbiamo fatto con il tessuto esterno; ecco la fodera con l'apertura nel fondo. La fodera non va rivoltata.

Ritorniamo ora ai manici. Una volta doppiato il tessuto con l'adesivo, pieghiamolo seguendo i tratteggi già predisposti e trapuntiamolo prima dal lato aperto...
Let's sew the handles: after we fold the stripes, sew them just right on the borders...
Sew the open side...

E poi anche da quello chiuso...
And then the folded one.

Utilizzando i segni sul cartamodello, appuntiamo i manici al tessuto esterno come da foto...
Using the pattern marks, let's pin the handles on the external fabric, as you can sea in the pic...

Quindi, infiliamo la borsa esterna dentro la parte in fodera, dritto contro dritto...
Now put the external bag into the lining side, right to right...

Bordo contro bordo, a filo, appuntiamo tutto con gli spillini e fermiamo i due tessuti...
Matching the upper borders together, and using the pins, let's fix the two parts of the handbag...

E' giunto il momento di trapuntare la fodera alla borsa, partendo da una cucitura laterale e facendo tutto il giro, magari ripassando la cucitura all'altezza dei manici...
Let's sew the lining with the exteral part, starting from a lateral side and going on following all the border. Make some more stitches when you meet the handles, as to reinforce them...

Ora si può risvoltare la borsa, tirando fuori l'esterno dall'apertura della fodera...
Now you can turn inside ou the bag, using the whole on the bottom of the lining.

Rimbocchiamo gli orli dei due lati aperti della fodera verso l'interno e stiriamoli...
Let's turn up the borders of the open side on the bottom of the lining and iron them...

Un piccolo trapunto a filo e la fodera ora è chiusa!
Let's sew and close the whole on the bottom.

Con un po' di pazienza, rimettiamo la fodera al suo posto, vale a dire dentro la borsa (...!!!) e, con gli spillini, fermiamola tutta in tondo, perchè è arrivato il momento della cucitura finale...
With a little bit of patience, let's replace the lining inside the bag. Let's fix it with as many pins you need end let's start sewing for the last time!

Ultimo giro di giostra!!!! Con il piedino a filo del bordo, facciamoci il giro dell'apertura della borsa...
Let's sew the bag all around its border.

Et voilà, i giochi sono fatti!!!
And finally, here it is, the bag is done!

Now it's your job to make a beautiful bag, embellishing it using your ability and your great fantasy!!!
P.s.: Questo è un modello piccolino, ma anche se fosse stato più grande, le operazioni di cucito sarebbero state le stesse. Iniziate magari con dei tessuti "poveri" per fare le prove;
i bottoni magnetici non vanno mai messi troppo in alto altrimenti quando si risvolta la fodera e si deve fare l'ultima cucitura di rifinitura, il piedino della macchina potrebbe non avere spazio a sufficienza per passare; se non si hanno i bottoni magnetici, si possono usare quelli a pressione da cucire a borsa finita...
Se avete delle domande da fare, scrivetemi senza problemi.
OHI!!! Non serve dire che poi mi piacerebbe vedere i vostri lavori...
Dimenticavo: il mio modello non ha copyright, lo potete usare per cucire borsette ad uso personale e non... Insomma, potete fare come volete! Buon lavoro....
Grazie Lilla questo tutorial è splendido ...ci proverò...sono un pò dura di comprendonio ma ci proverò!!!Buona Giornata !!!
RispondiEliminaBacione!!
Annalisa
huuuu...ci provo subito!
RispondiEliminaBisou
Alessia
Le tue spiegazioni sono super perfette!!! Sul fatto che sia facile eseguire questo gioiellino, ho qualche dubbio....ma se lo dici tu!
RispondiEliminaurca, complimenti, sei bravissima e hai una pazienza straordinaria!!! ti seguo
RispondiEliminaFANTASTICO TUTORIAL!!! Spiegato benissimo e ricco di particolari! GRAZIE mille!!! Ciaoooo
RispondiEliminaDove acquisti le chiusure magnetiche per la borsa? Conosci qualche negozio online?
RispondiEliminaCiao ragazze e grazie per i vostri interventi...
RispondiEliminaPer Sewing Princess e chiunque altra volesse acquistare dei bottoni magnetici, vi lascio questo indirizzo online: http://www.u-handbag.com/
Vi troverete molti accessori per borse e bottoni di varie misure e colori.
Very nice your bag
RispondiEliminaThanks for your tutorial
Janine
My blog is
gwadabrode.canalblog.com
che meraviglia! prima o poi ci provo, magari ci riesco!
RispondiEliminaThanks for this beautiful pattern
RispondiEliminaI surely will make this bag
Cheers for the post, definitly something which i discovered interesting, enough to create me drop this comment.
RispondiEliminaNon ho capito benissimo come rifinire la base della borsa
RispondiEliminaUna volta che hai trapuntato il fondo, è fatto...
Elimina